Python Turtle
Have you ever been coding along, solving problems and fixing bugs, when you suddenly had the urge to create a digital artistic masterpiece? Well me neither, until I learned how easy it could be with Python Turtle. Python comes preinstalled with a library called turtle, which allows a user to draw using a cursor called a turtle on a digital canvas. Though mainly for children, turtle can also be used for anyone new to programming to get a feel for how the python language and programming in general works.

In this blog, I will be going over how to set up a Turtle application in python for Mac users. Python should come preinstalled on any Mac computer, but if you want to check, you can run the following command in you terminal:

As you can see, my machine is running version 2.7.16. However, Python is a unique language because it is set up in something called a virtual environment. This means we can run a specific version of python with specific versions of dependencies in each virtual environment! This won’t be necessary for our turtle application today, but it is important to keep in mind when working with python.
Getting Started
We can begin our python app like most other apps, by building a folder to host our files and opening it in our text editor of choice, here I will be using Visual Studio Code. Python files are named with the .py extension, so be sure whatever you name your file, it ends with .py.
Important Note!: You can name your file just about anything except turtle.py. The next step is to import from the turtle library, and if we name our file turtle python will try to import from that file instead of the turtle library that comes with python.
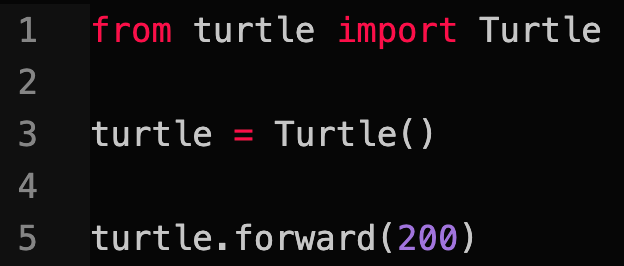
Now if you have any familiarity with other programming languages, you may have seen some type of import syntax before. What this allows us to do is bring in modules, objects, classes, functions, images, or any other piece of data we may need in the file we are working in. In this case, we are going to import a Turtle class. This will include many things, first of which we will use will be the function Turtle() that creates a turtle object. We will call this function and set it equal to a variable turtle. (This variable can be named whatever you want, but it is easy and good practice to simply call it what it is, a turtle!). The from keyword at the beginning indicates we are importing from the turtle module, which holds the Turtle class and others.

This might look like the same word turtle used over and over again arbitrarily, but it is important to recognize what each instance of the word is referencing and why.
Line 1: From the turtle module. Import the Turtle class.
Line 3: Create a local variable called turtle, set it equal to the Turtle function. This is one function extracted from thee Turtle class.
From here on out, we will be working mainly with that turtle variable. This is what is going to allow us to begin drawing pictures!
Moving Forward
Let’s get down to actually drawing something! We are going to use our turtle variable and functions imported in the Turtle class to steer our cursor(aka turtle) across a canvas!
One of the many functions available for our turtle is forward(). This does exactly what it sounds like, it moves the cursor forward, which in this case to the right because the cursor starts facing right. Forward() takes an argument of distance, or how far the cursor should travel. If we write the following code:
Then run the command to run our python file, in my case
python3 sample.py
A new window will appear and we will see a line drawn across the screen to the right! However, it happened so quickly, we did not really get a chance to appreciate it. Let’s fix that.
Importing the Screen
By adding an additional import, the Screen, we can persist the canvas even after our turtle has finished drawing. After we import the Screen, we create a local variable screen and set it equal to the function Screen(), just like we did for turtle. Finally, we call a function mainLoop() on screen to persist the canvas.
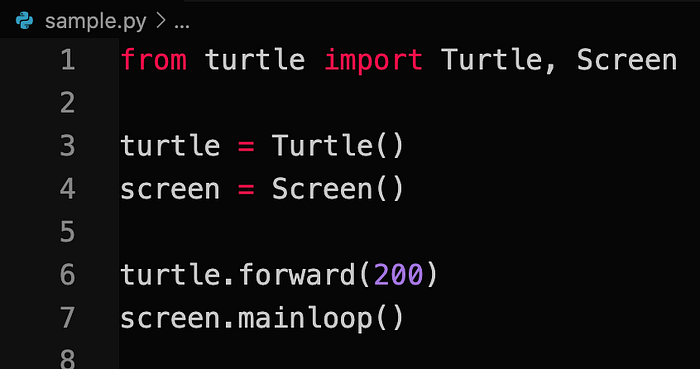
Now our canvas will persist and we can admire our masterpiece!

Understanding The Screen
It is easier to make your picture how you want it to look if you understand the screen itself. The screen is simply divided into four quadrants along an x and y axis.

As you can see from the image, the starting point of the turtle is by default at 0,0, and to indicate where you want it to go next you can tell it to go certain directions, or even specify exact coordinates. If you have ever taken an algebra class, think of graphing equations! Remember all the fun of y=mx+b ?
Let’s Get Creative
So far all we have done is make a straight line on a white canvas. Not exactly ready for the refrigerator, but there are a plethora of commands we can run to make an image here. Below I have listed just a few commands to get started with to help you create your masterpiece. At the end of the article, I will link the full Python Turtle documentation if you wish to delve deeper into creating Turtle art.
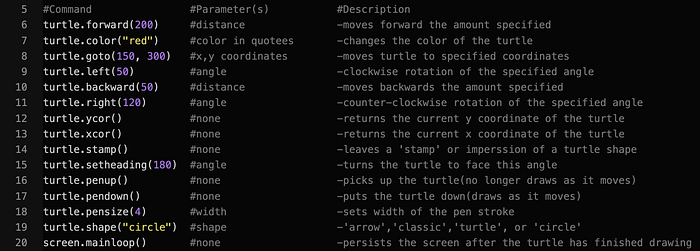
Try putting some of these methods together inside a function. Then you can call the function as many times as you want, and even pass it parameters to change the drawing! Try the following code and see what you get.
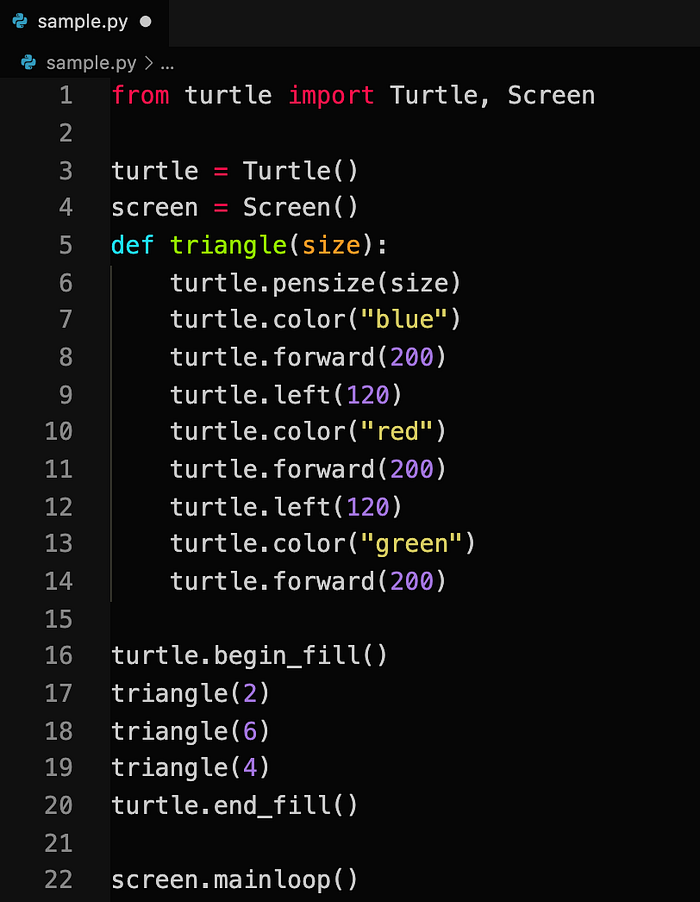
Be sure to look at the documentation and learn more about Turtle so you can create even more complex creations and designs. Use your imagination and be creative with functions and looping and you will be catching on the programming concepts without even knowing it!
Resources:
Python Documentation:
Turtle Functions and Procedures:
https://runestone.academy/runestone/books/published/StudentCSP/CSPTurtleDecisions/turtleFP.html
